This post shares simple tips to help you make your Miro boards more accessible for students. Each of these steps are quick to apply (under 5 minutes) and can improve accessibility if applied.
In this guide, you will be shown how to:
Boost focus with the ‘Bring everyone to me’ tool.
The ‘Bring everyone to me’ tool allows you to focus everyone’s attention on the same part of the board you’re discussing, teaching or editing.
This enhances accessibility by ensuring that all students are able to follow along in what can be quite a complex digital space.
It’s also particularly useful for boards filled with a lot of information as it reduces the cognitive effort required to find relevant information.
You can also reduce some of the potential distraction by selecting ‘hide collaborators tool’ to hide your cursor when using Miro for synchronous learning experiences.
How to:
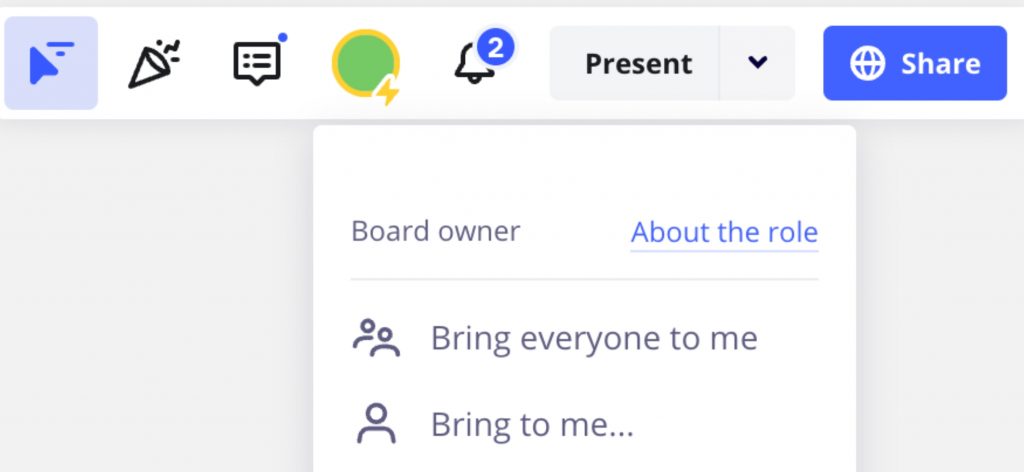
1. Click on your profile icon on the top right of the Miro board.
2. Select ‘Bring everyone to me’ from the drop-down menu.
Note: This option will only show up if there are other people accessing the board at the same time as you.
Reduce cognitive overload by creating frames
As Miro boards make it easy to compile a large amount of content on a single board, they have the potential to become quite ‘busy’ and crowded, which can be an overload of an experience.
To keep things tidy and easier to navigate, breaking down the boards into separate sections, or ‘frames,’ is super helpful, as it makes it easier for learners to find information.
Organising your content into frames can also be beneficial to students who find it easier to absorb information when it’s broken down into smaller, well-defined chunks.
The use of frames can help you to keep things structured and make sure that everyone can follow along without burning themselves out in the process.
How to:
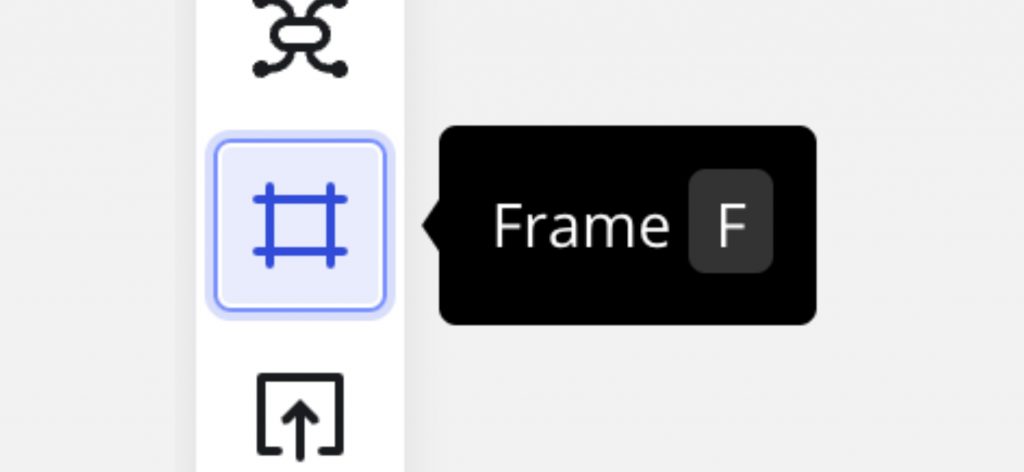
1. Click on the ‘Frames’ icon on the vertical tool bar.
2. Select from one of the templates or select custom to create your own frame.
3. Use your cursor to select the area you would like to fit into the frame and press ‘enter.’
Make participation easier with ‘Private Mode’
‘Private Mode’ in Miro is a feature designed to enhance privacy and focus during collaborative sessions. It allows individuals to work on their portions of a board without their actions being immediately visible to other participants in real time.
This can be especially useful during live classes or brainstorming sessions where learners might prefer to refine their thoughts or contributions before making them public. This can also be a game-changer for students who might feel less confident or who find such social situations anxiety-inducing.
By removing the fear of public scrutiny, private mode can help to break down barriers to participation, making it easier for all students to contribute and be heard.
How to:
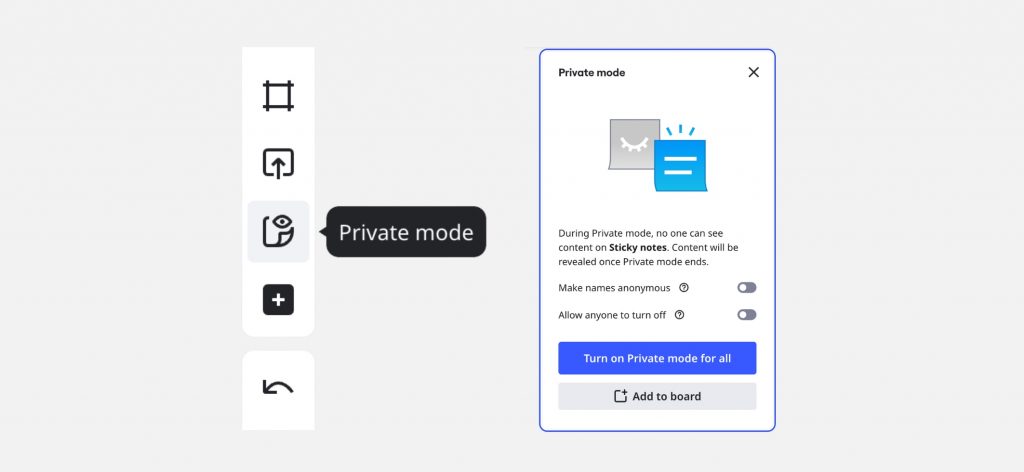
1. Choose the ‘Facilitation tools and reactions’ set of icons in the bar on the top right of the Miro board.
2. Select ‘Private Mode’ from the drop-down list.
Prevent accidental changes with the lock feature
Using locking features on collaborative boards can help to safeguard the workspace’s intended layout and functionality.
Without such preventative measures, there may be accidental changes that can affect the user experience and disrupt consistency.
Consistent layouts also benefit users who rely on screen readers or have cognitive disabilities by creating a predictable environment where they can easily find information. Repeated use helps them to memorise where to go each time they access the board. If elements are accidentally moved around or edited, this can impact learners’ ability to do this.
How to:
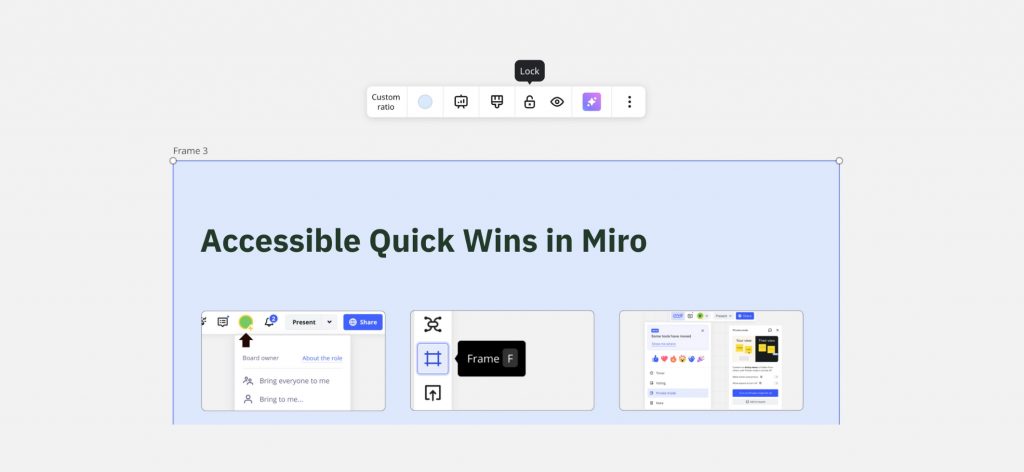
1. Choose the frame you wish to lock.
2. Select the frame and then the ‘lock’ icon that appears in the toolbar.
Use alt-text for enhanced screen reader use
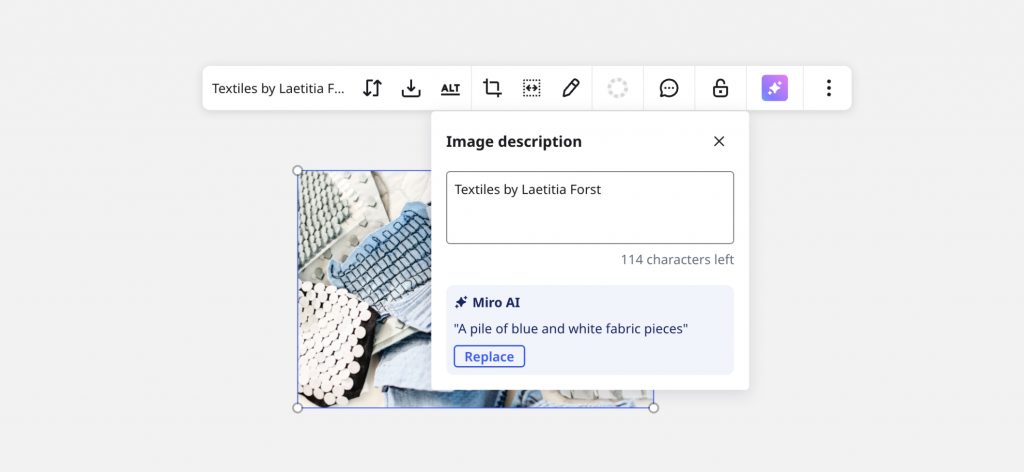
Including alt-text plays a crucial role in communicating visual information for any learners who need to use screen readers.
Miro has embedded alt-text/ screen reading capabilities across all features (including graphics and icons) however, when uploading custom images from devices, these will need to have alt-text manually created for them.
This ensures that learners who have visual difficulties (for example) can engage with every aspect of a Miro board, including uploaded images.
Since there doesn’t appear to be a direct ‘alt-text’ function, you can achieve this by changing the title of the image to an alt-text description instead.
How to:
1. Select the image you wish to annotate.
2. Change the image name in the left-hand corner of the pop-up.
Adjust background colour to improve clarity
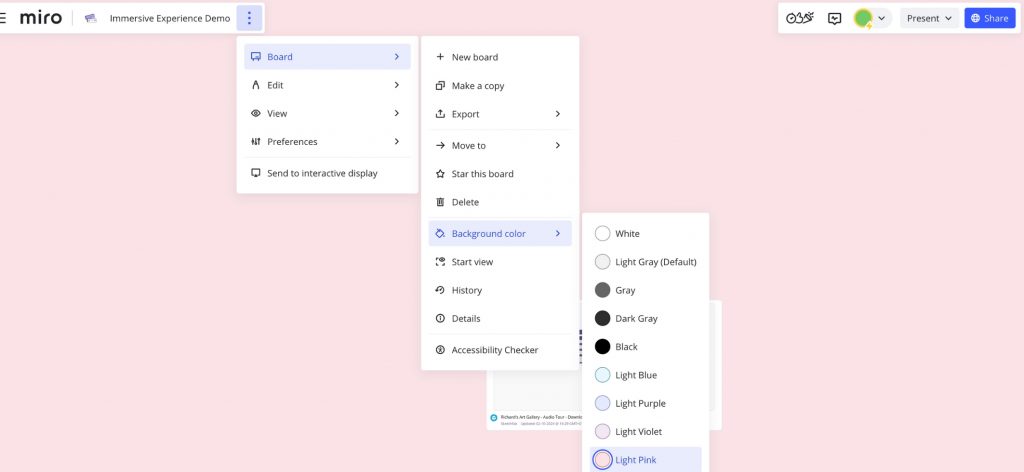
Changing the background colour on Miro boards can be a simple yet effective way to enhance accessibility for all users.
Different background colours can reduce eye strain, increase contrast, and make it easier for learners with visual sensitivities or colour perception difficulties to engage with content on the board.
For example, using a light grey background with dark grey text provides a gentle contrast, while navy blue with white text offers high readability for low-vision users. Pastel shades, like lavender or sage green, create a welcoming, calm environment that can help reduce visual fatigue during collaborative sessions.
How to:
1. Select the three vertical dots next to your board name (top left).
2. Select board > Background Colour.
Optimise your learning material for screen readers by numbering frames
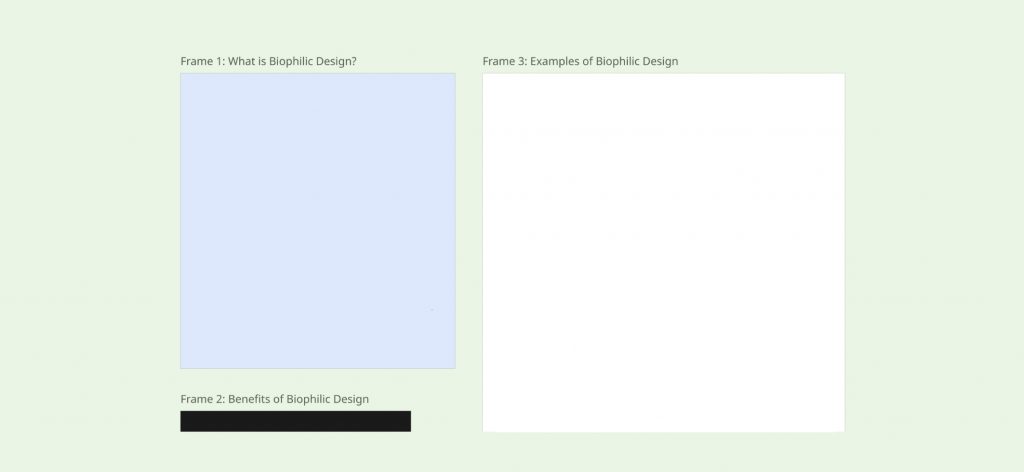
Numbering your frames as well as your sections not only helps students to understand the structure of your learning space on Miro, it also helps to establish a reading order for screen readers.
As the default frame reading order is set to the order in which you created each frame, this can mean that if you decide to swap things around at a later stage, the reading order will still be fixed to the initial order of creation. A way to redirect this, is to display the frames in sequential order along with numbering the frame titles.
How to:
1. To reorganise frames, click on an empty space within the frame (this will select the entire frame.)
2. Use your mouse, keypad or directional keys to drag or move the frame to the desired position.
3. To number your frame, select the frame title to rename it.
4. To test the reading order of your frames, use the tab key.
Use the accessibility checker to review your board
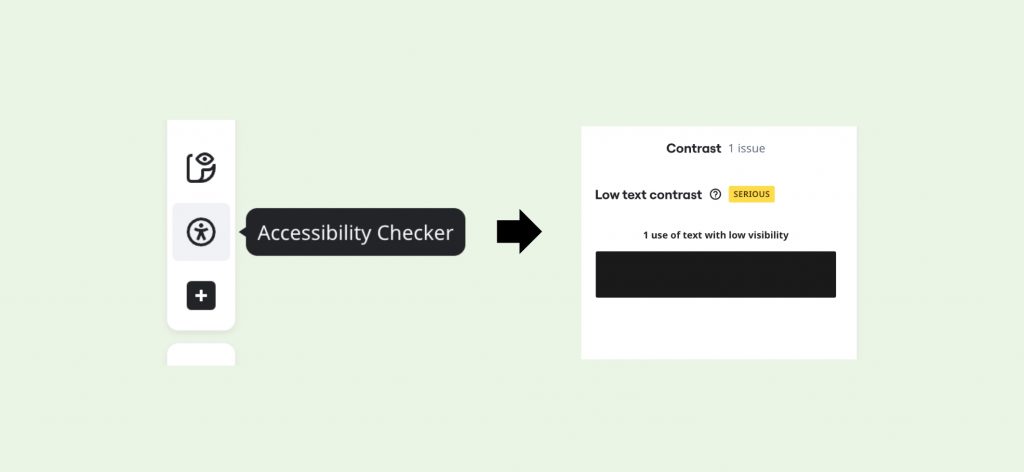
Miro’s accessibility checker tool helps to both identify and fix accessibility issues within your boards, such as missing alt-text or colour contrast issues. It’s a quick way to review your boards and make sure they’re as accessible as possible.
How to:
1. Open your Miro board.
2. Click the More tools icon (three dots in the bottom toolbar).
3. Select Accessibility Checker from the menu.
4. Review any flagged issues and follow the suggestions provided.
5. Make adjustments directly on your board to improve accessibility.
Further Learning
Read how to make your Miro boards more accessible. (Web page)
View the ‘Making accessible learning experiences in Miro’ board (Miro board)